5 Advanced Tricks & Tips for Mastering Google Tag Manager
Google Tag Manager is a tool that can bring highs and lows. It can lead you down a path of troubleshooting that will take hours for you only to realize you forgot to hit “submit” for your changes. It has the capacity to put you on the top of the world when you set up tracking for something you thought was impossible.
GTM, like anything, requires years of experience to really master. Tag implementation isn’t just about simple Facebook pixels, or GA form submit tracking…it’s about utilizing GTM to provide data that helps you tell a story.
I’ve been working with GTM since 2016, after a past manager of mine asked if anyone on our digital team wanted to take up the task of swapping 26 regional US websites GA tracking from hardcode to within GTM. I volunteered and I became (literally) obsessed with it from then.
I’ve come across some really helpful advanced tricks and tips along the way that I like to use on a regular basis that I believe can help you become a master of implementation.
Here they are…
1. Learning Regular Expression
By definition according to Wikipedia, “regular expression (shortened as regex) is a sequence of characters that define a search pattern.” To help show regex in practical form, I thought I would show you some examples of regex and how it works to make your job easier in Google Tag Manager.
Example: .* (Period star)
Let’s say you want to set your link click trigger so that it fires only on your select landing pages that all include a URL pattern like: www.website.com/lp-1, or www.website.com/lp-2.

In this regex example, we’re telling Google Tag Manager we want the trigger to fire on any page as long as it contains “lp-”.
In basic explanation, the characters .* indicates you do not care what is before your string, or after, or even between your string. It works perfectly here as both of your URLs contain “lp-”. Though this isn’t the perfect example, it can save you A LOT of time if you have many possible landing pages you want this trigger to fire on, and you aren’t sure how many, or what their URLs are. As long as the URL contains “lp-” (or whatever your constant variable is), you are good to go!
Example: | (Pipe symbol)
This character is probably the first regular expression character I learned and one I use pretty much every day. For example, you have a bunch of different CTAs you want to have your trigger fire on. Let’s say your CTAs are “Call Now” “Apply Now” and “Contact Us For More Info”.

In this regex example, we’re telling Google Tag Manager we want the trigger to fire as long as the click text is “Call Now”, “Apply Now” or “Contact Us For More Info”. The pipe symbol acts as an OR statement.
There are many, many different regular expression characters and what I’ve provided above doesn’t even crack the surface, so I am going to provide a handy regex cheat sheet created by Loves Data, an Australian-based digital marketing educator.
2. Using Regex101.com
Now that you’ve read my #1 in this blog, you are going to want to start using regular expressions, right? And since you’re going to be writing regular expression, you want to know if it’s correct. Here’s an easy way to know…
Regex101.com is a free website that tells you if your regular expression will match the string you’ve provided.
Here is an example:

I want to create a regular expression to track any page on our website. That string says that whatever is before or after granularmarketing.com should be included. I have included a URL on our page to illustrate that when the regular expression matches your test string, it will highlight the text string in blue.
You will see on the right side of the page:


This helps you confirm that the regular expression matches your test string as well as provides an explanation of why it works.
3. Copy CSS Selector – Chrome Extension
Sometimes while using Google Tag Manager, you need to use user-defined variables to create a trigger using something other than what is provided in your list of predefined variables. The “Copy CSS Selector” allows you to very easily extract the particular CSS element that you’ve selected on a page.
Once you have the Copy CSS Selector extension in Chrome enabled, right-click on the element you want to track:
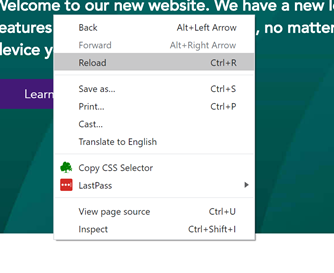
You will know that the element is selected when a dotted box appears around it:

Then paste the CSS element within the “element selector” of your DOM Element user-defined variable:
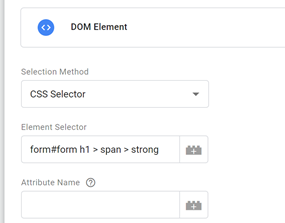
I should note that for particular sites, this will not work as intended. It’s worth testing to make sure it collects the right element.
4. dataLayer Inspector+ – Chrome Extension
The dataLayer Inspector+ Chrome extension is a wonderful tool that allows you to review the dataLayer.push() events that are happening on any website.
The traditional console tab in Chrome Dev Tools on a page load would show a very limited amount of information.
The console tab on a page load with dataLayer Inspector+ disabled:

The console tab on a page load with dataLayer Inspector+ enabled:
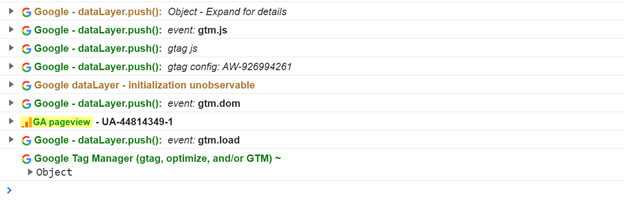
As you can see, it clearly outlines your GA pageview events, as well as your standard GTM events, like gtm.dom (DOM Ready), gtm.load (Window Loaded) or gtm.js (Page Load).
It can tell you more detailed information, like if you’d like to see a particular ecommerce dataLayer.push() event:

It makes your job easier…so download it!
5. beforeunload JavaScript Event
Author Note (October 19th, 2020) – While this custom Javascript included above is helpful, the recent changes Google has made to Tag Manager means that the event history is no longer reset on page load. So for most situations, this code is unnecessary.
I will admit that I am not an expert in JavaScript. I understand how it works. But I can not really write it. Thankfully with this JavaScript event, it’s simple and you do not have to manipulate it in any way.
Why is this useful? I’m sure you’ve experienced in the past when testing a form submission or link click that the next page will load on you, thus clearing your GTM debug panel. This makes it tougher to pick your trigger variable. Perhaps you’ve tried holding control to open the next page in a new tab, or you’ve been quick enough to hit ESC before the next page loads. These are great options but they don’t always work. The beforeUnload event makes it so you can control if the next page is loaded.
Let me show you how it works.
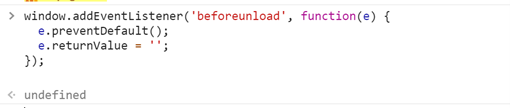
1. You paste the code into Chrome Dev Tool’s Console tab
2. You will hit enter and it will state “undefined”
3. Go back to your page you are working on and submit the form, or click the link you want to view…you will receive a notification alert in Chrome like this:
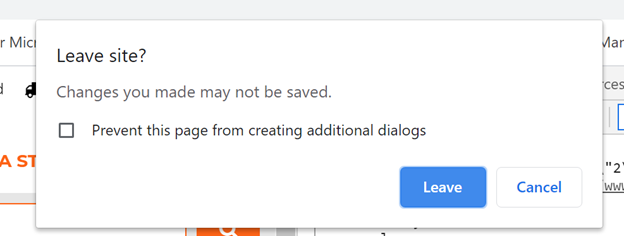
Click “cancel” and you will see your events appear in the GTM debug panel. This script denies the next page from loading without your consent.
This is not always necessary, but next time you run into an issue like this, utilize this event. Don’t worry about saving this code into a notepad either, you can create a saved “snippet” within the “sources” tab of Chrome Dev Tools.
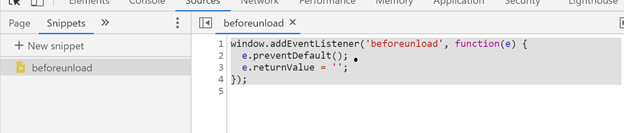
Every time you need to use that, copy and paste it from your sources tab into the console tab.
These are all tools that I use daily to make my job in Google Tag Manager much easier. I hope you find them helpful. Anything I missed that you use? Let me know below in the comments.