A Simple Guide to Setting Up a Snapchat Business Manager
Snapchat Ads now offers a business manager akin to what you’re used to in other large ad platforms. This enables an advertising agency to seamlessly link multiple client ad accounts. Here we’ll break down the steps to set up your agency Business Manager, as well as how to link client ad accounts.
Creating a New Snapchat Business Manager
Following these steps will allow you to manage and link client ad accounts through Snapchat, then you’ll be creating snapchat ads in no time!
- Create a Snapchat account by visiting ads.snapchat.com and clicking “Sign Up” at the bottom. The email you use to sign up will be what you use to get access to any future accounts, so using a general business email is best.
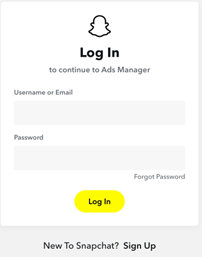
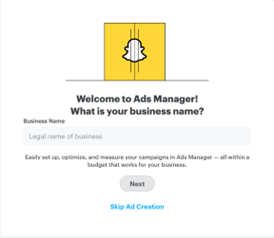
- Now that you have a Snapchat account, you can create a Business Account by visiting the snapchat log in page, logging in with your new account information, and inputting your business information like name, email, country and currency.
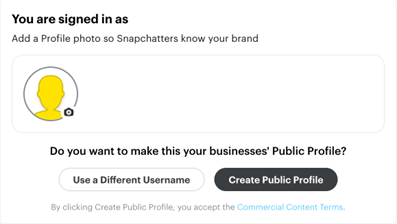
- Next, you need to create a public profile in order to run ads. This profile should reflect your business, not you personally, since this will show alongside your ads. You will need to upload a profile image, which should be your business logo. You can change this later if needed.
- Once you complete this initial setup, Snapchat will automatically create an account for you. Now that you have a business account there are several additional settings to check.
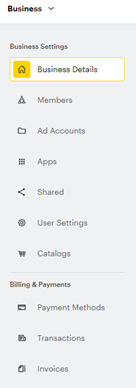
- Click into the upper right menu and select “Business Details.” Ensure that your organization’s address is correct (this is required to run ads).
- Within the right menu of Business Settings, navigate down to “Payment Methods” and ensure your credit card details are added.
Adding Members to Your Business
Once you set up your public profile and business account, you can add “Members” to the account. This is where you would give access to other employees or vendors.
- Within Business Settings, navigate to Members.
- Add new Members with their name and email.
- Choose their access level:
- Member: Can access the organization, but need to be given additional permissions to take any actions.
- Business Admin: Can access and change business info like payment methods, business details and roles, but do not have any access to the ad accounts.
- Organization Admin: Can change business details and have edit access to all of the ad accounts within the Snapchat Business Manager.
- If you give a new user “Member” level access, you will then need to click into their user profile and assign them roles for individual ad accounts, public profiles and catalogs. Each section has different roles available. You can hover over each role to see the access details.
Creating Additional Ad Accounts
If you’re an agency, you can now create additional ad accounts following the instructions here. If you’re a business user, you will most likely need only the ad account that is initially created when you set up the Business Manager, but you may want to create more than one if you have multiple lines of credit, or want to use Snapchat’s on-demand filters.
Now you’re ready to advertise on Snapchat! This is a great platform for reaching an audience ages 13-34, who are tech-centered and focused on engaging imagery and video content. There are a surprising array of audience targeting options, including customer match, lookalikes, remarketing, interest targeting and more. There’s also a Snap Pixel to track conversions and build audiences.
Definitely consider giving Snapchat a chance if you are targeting users age 13-34, because Snapchat reached 75% of them! And reach out to Granular if you need help getting Snapchat ads up and running for your business.