LinkedIn Has Finally Rolled Out a Much-Needed Feature: Business Manager
In recent months, LinkedIn has rolled out its own version of Business Manager similar to Meta. This is designed for a more streamlined approach to managing and sharing all of your LinkedIn assets (page, ad account, etc.) both internally with your team and externally with agency partners. Setting up your company in Business Manager as soon as possible will ensure smoother transitions with all your shared accounts and can prevent access issues in the future. This is especially important when an old employee leaves without realizing they may have been the only one with proper access to make changes (not that we have seen this happen repeatedly). As with any new feature, there will naturally be a bit of a learning curve, but once your company is fully onboarded with your Business Manager, your life will become exponentially easier.
Step by Step Quick guide to starting Business Manager Account
Note: you must have admin-level access to claim your business assets into a Business Manager
- Step 1: Go to https://business.linkedin.com/marketing-solutions/business-manager and select the “Create Business Manager” button
- Step 2: Add your company info. NOTE: Be sure to add your work email, as the form mentions. Do NOT add the personal email associated with your LinkedIn profile (you will make the connection between both emails in the next step)
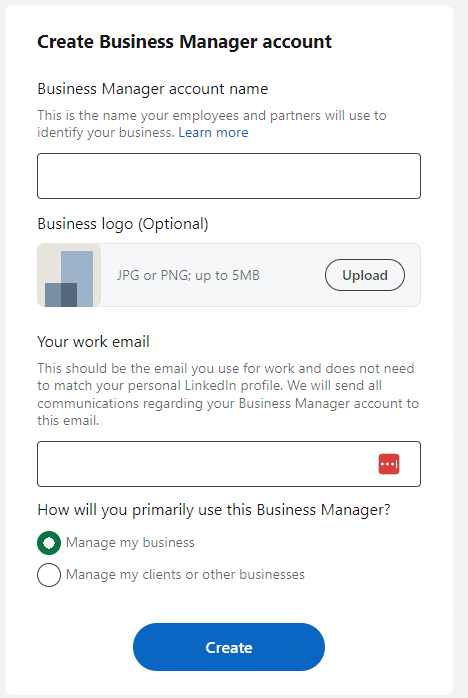
- Step 3: Confirm you see your personal profile information
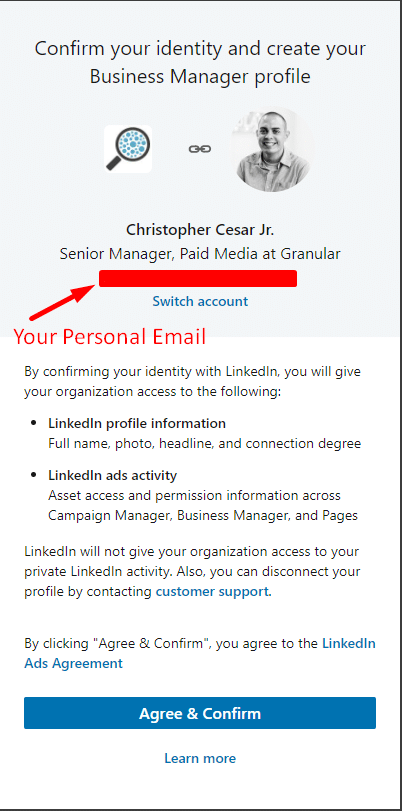
- Step 4: Your Business Manager will be live! You will also get an email from LinkedIn with a link to confirm your email address.
- Step 5: Be sure to bookmark this home page of your Business Manager, as this is where you will manage everything related to LinkedIn moving forward.
- Step 6: Go through each given option, one by one
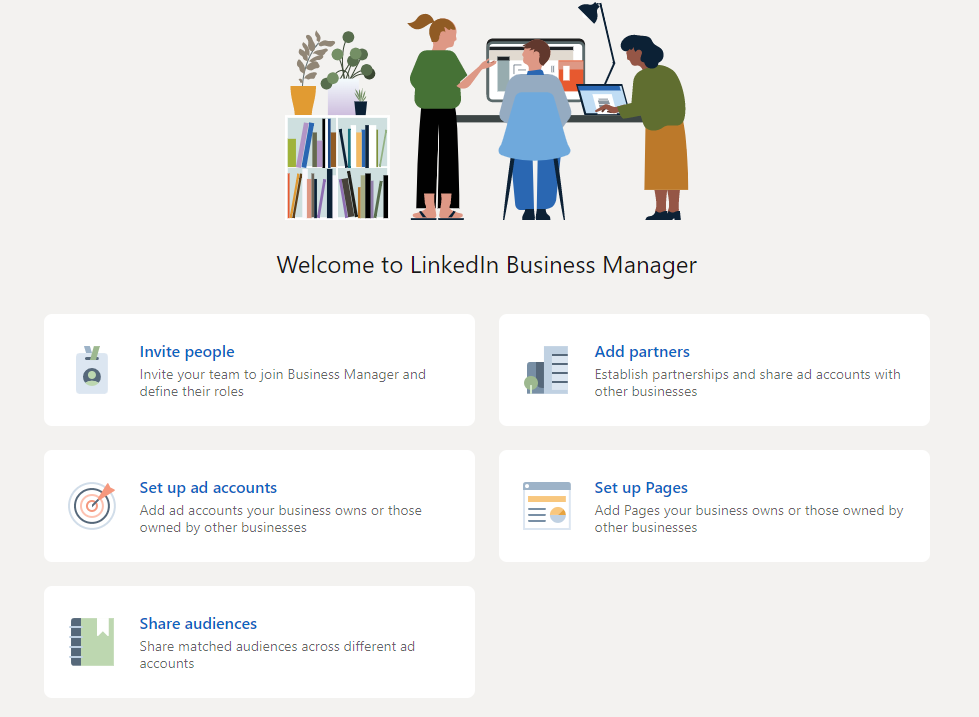
What’s Next: Invite People, Add Partners, Set up Business Accounts & Add Pages
Once the initial steps above are followed, and your account is live, you can populate it with additional assets like team members, additional ad accounts and ad partnerships and more.
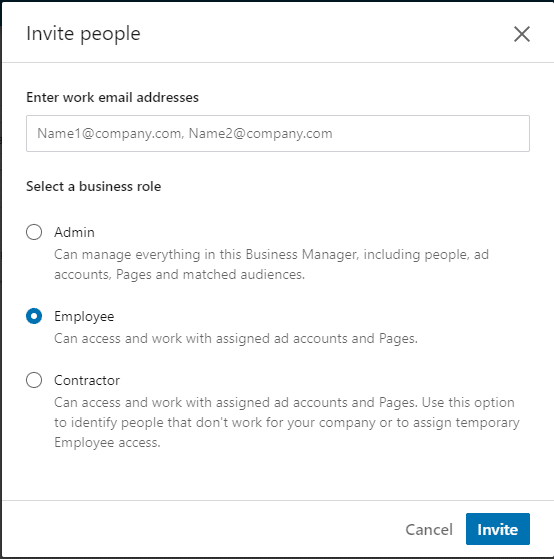
Invite People to LinkedIn Business Manager:
You have three permissions options based on what each person needs (remember to add their work email!)
Add Partners:
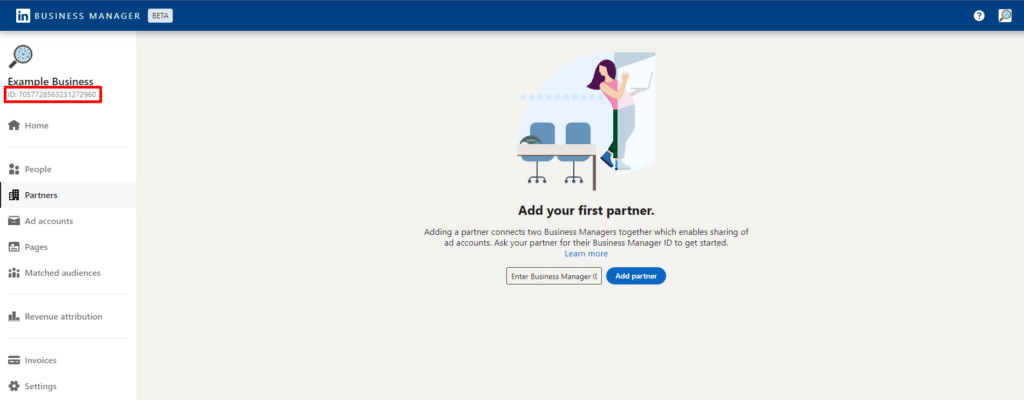
If you work with an agency for any social campaigns, paid or organic, they should also have Business manager access (If not, refer them to this blog post!). You will need your agency’s partner ID, found in the top-left corner of any page in Business Manager. Note: after you have shared a partnership with another business, you will still need to grant access to each business asset. By default, they won’t have access to anything.
Set Up Ad Accounts:
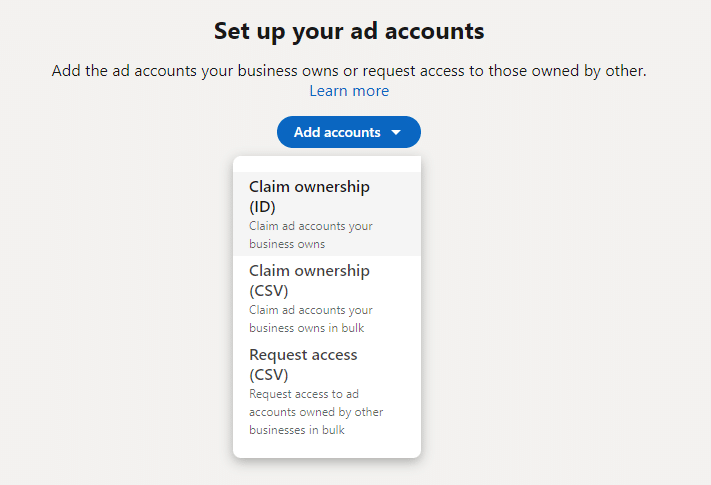
If you advertise on LinkedIn, you can claim your Ad Account in the Business Manager with the Account ID. If you do not yet have an ad account but need one, you will need to create that separately in Campaign Manager and then claim it into your business. New account creation is not yet supported in Business Manager.
Add Pages:
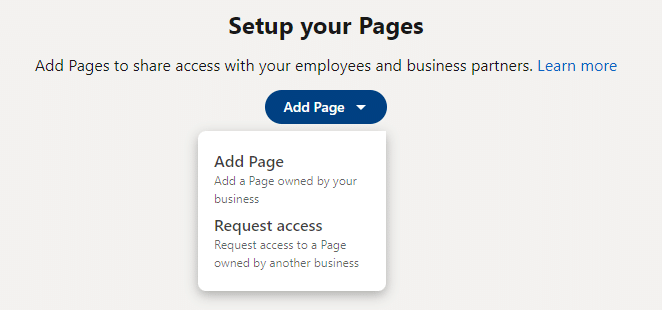
Similar to the Ad accounts section, you can claim ownership of your existing page(s) by URL or page name. You can’t create a page within Business Manager. If, for some reason, you need access to a page owned by someone else, you can request access to that page as well without claiming ownership.
After that, you should be all set! If you are a more advanced marketer, there are additional steps you can take within, such as connecting your CRM and managing your re-marketing audiences.
Once you’ve added the appropriate users and claim all of your accounts, I suggest going back to each asset and ensuring every person has been assigned access to what they need. It’s admittedly not very intuitive, just because everything is housed in one location does not automatically mean everyone is connected to everything. With everything contained in one place, however, management of “who can access what” will be much smoother.
